Please note this post may contain affiliate links.
I’m often asked how I started my blog, and how challenging it really is to get started blogging. Let me first start by saying that starting a blog does not require you to be a technical wizard. When it comes to technical skills, I’m more on the challenged end of the spectrum. I don’t know how to code, and I still have to google most technical terms.
When I started blogging a few years back, I didn’t think of it as more than a hobby. That was before I realized that your career can actually benefit from blogging, in addition to it being a great side hustle. For some, blogging has actually turned into a fulfilling and lucrative career.
WANT TO START A BLOG ON WORDPRESS? CLICK HERE AND USE THE STEPS IN THE TUTORIAL BELOW.
Starting a blog doesn’t have to be expensive or overly time-consuming. You can actually start at a pretty reasonable cost, like I did. I didn’t have much money to spare then, and was looking for an effective yet inexpensive way to get started in the blogging space. You can do just that by selecting Bluehost as your blog’s host, especially if you plan to make extra money, or use it as a foundation for your business or freelance gig.
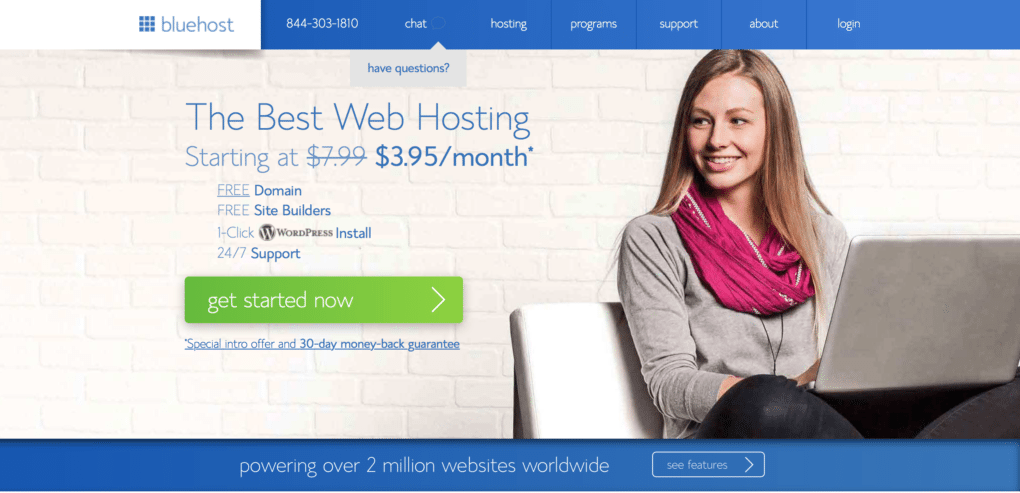
As one of the best web hosting services out there, Bluehost offers plans starting as low as $3.95/month. What I also find most attractive is that you can get your domain through Bluehost (which you will need in order to run ads, affiliate links, etc… through your site), and that you can set up the basics of your WordPress blog straight in Bluehost. While there are various web hosting plans available, including a 36-month plan, I have been using the 12-month plan which is very affordable and practical.
How to start a WordPress blog with Bluehost
Why Should You Use Bluehost?
There are a number of web hosting services out there, yet I have to say Bluehost is my favorite. Here’s why I personally recommend it:
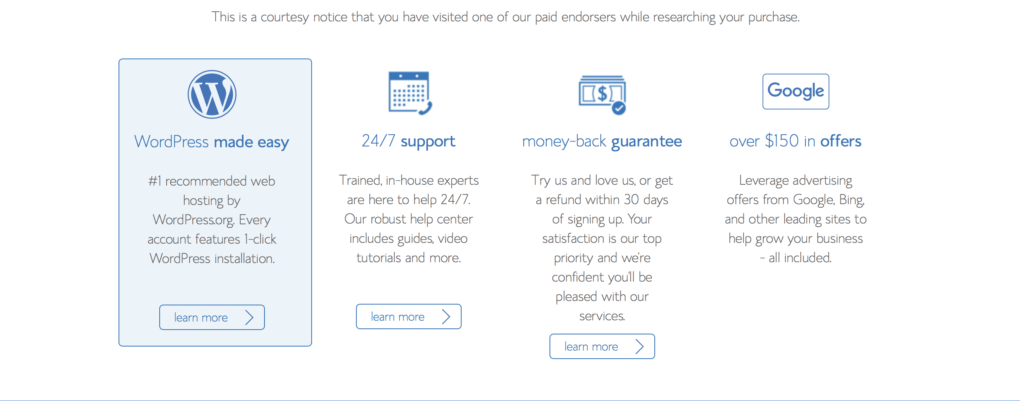
- You don’t have to be tech-savvy to use it! This is hugely important for me, as I mentioned earlier I have VERY limited technical skills ( and I mean, VERY);
- It’s extremely affordable! I know first-hand that when you’re starting out in the blogging space, you may not necessarily want to invest a lot of money upfront. I didn’t, and picking Bluehost allowed me to have reliable yet very affordable web hosting;
- If you don’t like it, you can back out! The 30-day money back guarantee is a great incentive to try it without fully committing yourself to it, in case you want to experience other services as well;
- Technical support is available 24/7! This is another great plus for me, as I don’t have to worry about not mastering any technical aspect of my blog. Customer service is available and very helpful;
- Your domain is FREE! One of the earlier mistakes I made with another blog of mine is not to have my own domain name. If you plan to establishing yourself as an authority, you want your own domain;
- Your WordPress blog is FREE through Bluehost! Once you sign up for Bluehost, you can set up your own WordPress blog free of charge;
- Being self-hosted allows you to monetize your blog! When TCS started out, it was hosted on WordPress. However, I quickly realized that in order to monetize my site, it would have to be self-hosted.
How to start a WordPress blog with Bluehost
Here’s a quick tutorial on getting started with setting up your WordPress blog with Bluehost:
Step 1: Got Domain? Register Your Domain Name
Have you thought about what you want your blog name to be? One of the first, and maybe one of the most important steps in setting up a successful blog, is to find the right domain name. For me, The Corporate Sister was born out of my own experience and story, so it felt natural.
If you’re having a hard time coming up with a domain name, just think about the purpose and mission of your blog and how it aligns with who you are. This way, it reflects both YOU and your mission. You may also want to go for a domain name that is easy to spell, remember and share!
Click HERE to purchase your domain name. As a bonus, you get it for FREE as long as you sign up for 12 months of web hosting through Bluehost. I personally prefer this option as you end up saving money on the long run, in addition to scoring a free domain name. Besides, you don’t have to deal with hiccups like change in credit card numbers or missed payments on a month-to-month basis, which can cost you your site being down for days! You can save even more by picking the 36-month plan, so you may want to consider which option is more economical for you in the short and long-term.
Step 2: Pick Your Hosting Plan!
There are various plans available for web hosting through Bluehost, based on your needs.
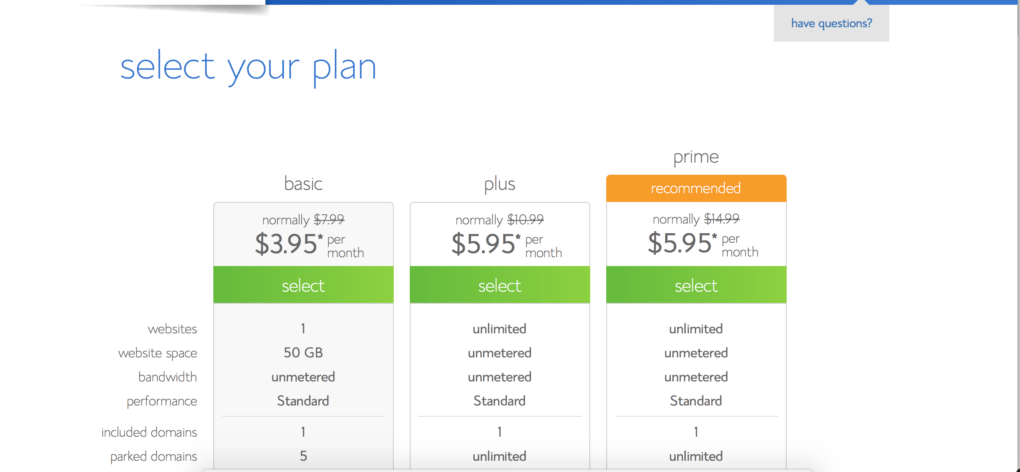
How to start a WordPress blog on Bluehost
I started out with the Basic plan, which is priced at the very reasonable rate of $3.95 per month granted you sign up for 36 months. If you sign up for a shorter term, the rate per month slightly increases. If you’re just starting out, that’s really all you need!
Keep in mind that you’re not locked into a particular plan, you can always switch plans later on. One additional recommendation I would make is to also pick the Domain Privacy Protection, which ensures your information is safe.
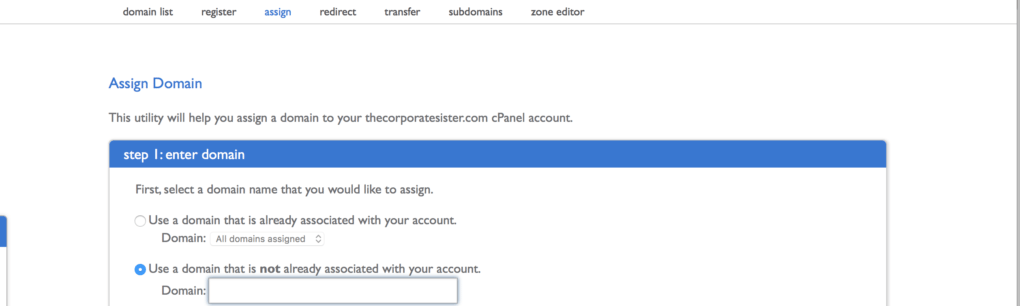
Step 3: Check that your domain and hosting are linked
If you purchased your domain through Bluehost, then this step is already taken care of for you.
However, if you purchased your domain name through other web services such as GoDaddy, you want to link your domain and web hosting. Consult this page from GoDaddy’s technical help for further information.
In Bluehost, you want to add the domain you purchased to your web hosting. You can do this by going to “Domains” in your account, click on “Assign” and follow the instructions. If in doubt, contact the Bluehost Helpdesk.
Step 4: Now Set Up Your WordPress Blog!
Last but not least, you get to set up your blog for FREE!
- Go to the cPanel in Bluehost , and click on “One Click Install”.

- On the next page, click on the WordPress icon.
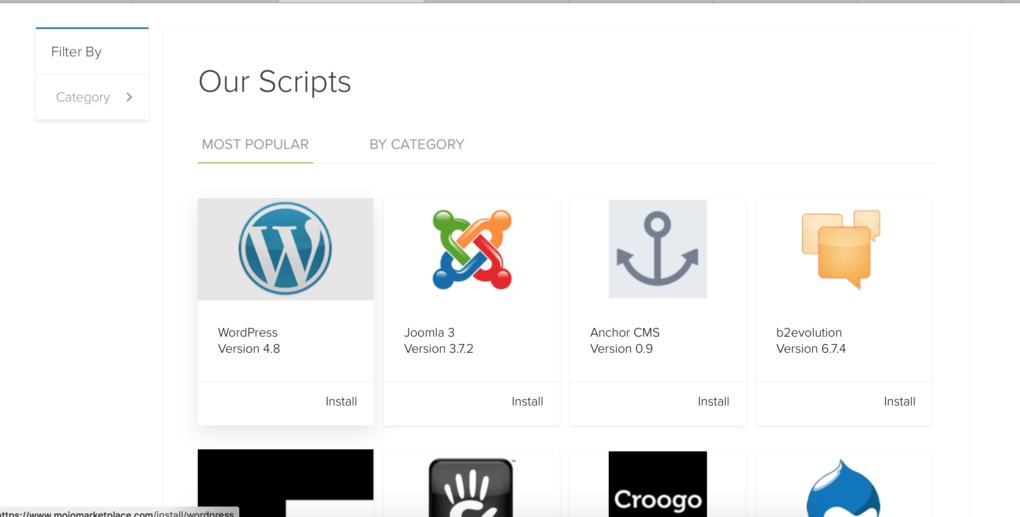
- Click on the “Install” button.
As part of the installation process, you will have to click the dropdown menu and pick the domain you will be using. You will also have to choose your username and password for your WordPress website. Keep in mind to pick a username and password that are secure enough, with a combination of letters and numbers that’s not easy to guess.
Are you ready to create your WordPress blog with Bluehost? Click HERE to get started today!
To Your Success,
The Corporate Sis.


Thank you for this. I will be migrating my blog from wordpress.com to wordpress.org in the next couple of month. I need all the tips I can get.
Hi Valarie, thanks so much for your comment! You’re so very welcome! I did migrate my blog from WordPress.com to WordPress.org a few years back too and never regretted it. Let me know if I can help and best of luck!
Where were you when I started my blog six years ago? Great tips! 🙂
Thanks so much, I know blogging can be a long process but you have to keep at it! I’d be happy to answer any questions you may have! Keep at it, you’re almost there!